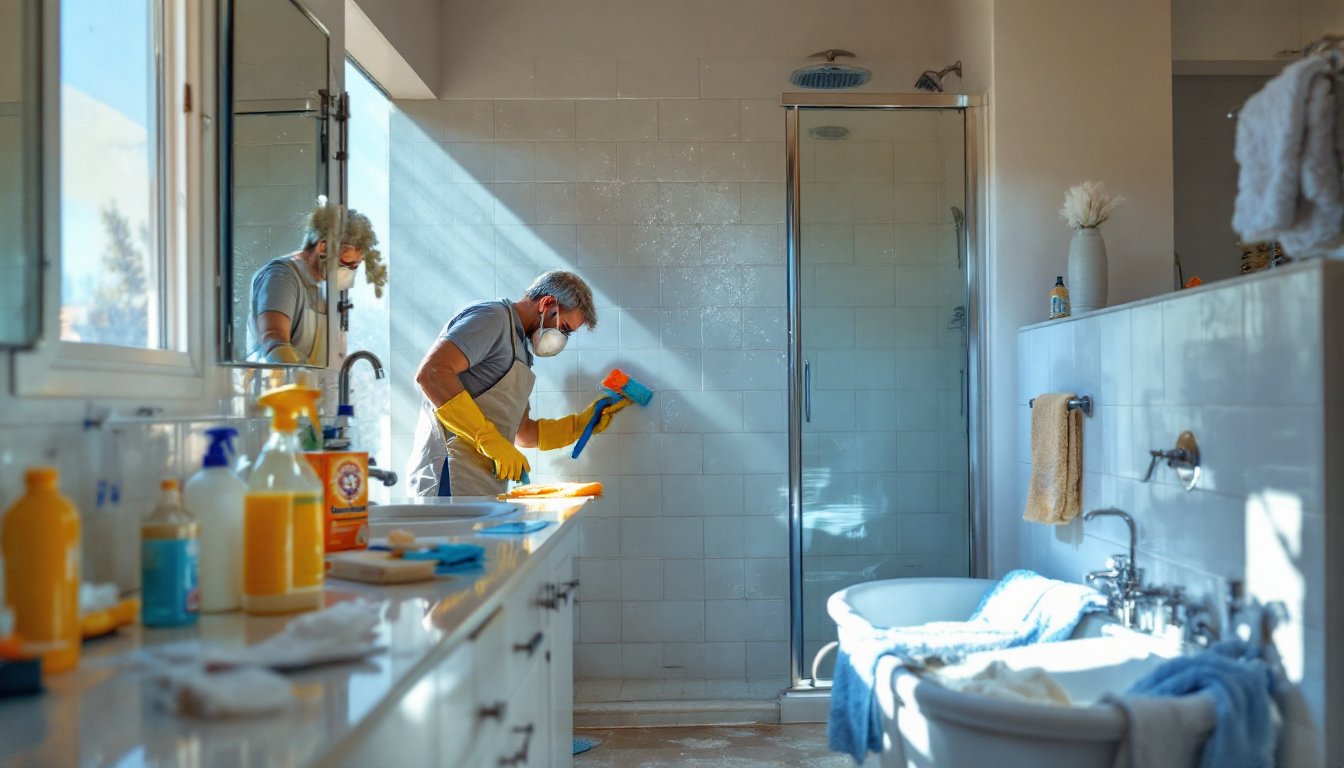
A truly clean bathroom doesn’t happen by accident, it takes strategy and elbow grease. Deep cleaning goes beyond the daily wipe-down: you’re removing soap buildup from shower walls, scrubbing grout lines, degreasing fixtures, and tackling the ventilation fan that’s been quietly collecting dust. The good news? You can tackle a complete bathroom deep clean in one concentrated weekend without professional help. This guide walks you through the supplies you’ll need, the most efficient order of attack, and proven techniques for stubborn stains and hard water deposits. Whether you’re prepping for guests or just reclaiming your bathroom, a methodical approach beats random scrubbing every time.
Table of Contents
ToggleKey Takeaways
- Deep cleaning your bathroom requires a strategic top-to-bottom approach and typically takes 4–6 hours over a weekend, using budget-friendly supplies like vinegar, baking soda, and bleach-based cleaners.
- Work from least to most toxic solutions and clear surfaces first—dust falls downward, so dry-clean ceiling areas before wet cleaning to avoid re-cleaning.
- White vinegar tackles hard water deposits and soap scum by softening mineral buildup without scratching; let it dwell 15–20 minutes for best results.
- Grout lines demand a baking soda and vinegar paste left to sit 5–10 minutes, followed by firm scrubbing with a stiff-bristled brush—porous grout traps the most dirt and mildew.
- A simple 10-minute weekly maintenance routine with a shower spray and squeegee prevents soap scum and mildew from returning and extends your deep clean results by 3–6 months.
- Always ensure proper ventilation by opening a window and running the exhaust fan during and 20 minutes after cleaning to manage humidity and prevent mold growth.
Essential Supplies and Tools You’ll Need
Before you start scrubbing, gather your materials. You don’t need an expensive arsenal, most items are already under your sink or cost just a few dollars.
Cleaning Solutions:
• Bathroom-specific spray cleaner (e.g., Scrubbing Bubbles, Windex Bathroom) – Works quickly on mirrors and fixtures with minimal scrubbing.
• White vinegar (distilled, 5% acidity) – A mild acid that cuts soap scum and hard water deposits without fumes.
• Baking soda – Mildly abrasive, odor-neutral, and safe on most surfaces: mix with water into a paste for stubborn stains.
• Bleach-based cleaner or bathroom mold spray – For tough mildew: use with ventilation and never mix with ammonia (creates toxic gas).
• Grout cleaner or oxygen-based stain remover – Stronger than baking soda for tile grout lines.
• All-purpose degreaser – Cuts soap residue and buildup on fixtures and hardware.
Tools:
• Soft-bristle toilet brush – Standard bristles for the bowl: reserve a dedicated brush for toilets only.
• Grout brush (small, stiff-bristled) – A tile grout brush or old toothbrush works here: brass bristles won’t scratch tile.
• Sponges and microfiber cloths – Microfiber doesn’t leave lint and is reusable: sponges are good for scrubbing.
• Mop and bucket – For floor finishing: a traditional mop or a disposable-pad system both work.
• Squeegee – Removes water streaks from shower doors and walls after rinsing.
• Rubber gloves – Nitrile or heavy-duty rubber: keeps your hands dry and protected from chemicals.
Safety Gear:
• Safety glasses or goggles – Splashes happen, especially overhead work on exhaust fans.
• Dust mask or respirator – If using bleach or mold sprays, ensure good ventilation: a N95 mask provides basic protection from chemical mist.
• Ensure good ventilation – Open a window and run the exhaust fan during the entire project.
Don’t feel pressured to buy premium versions of every product. Budget cleaners and generic baking soda are just as effective: the real work comes from time and technique.
The Best Order of Attack for Deep Cleaning Results
Cleaning in the wrong order wastes time and forces you to re-clean surfaces. Work from top to bottom and least toxic to most toxic solutions.
Step-by-Step Sequence:
- Clear and declutter – Remove everything from countertops, shelves, and shower ledges. Toss expired medicines and empty bottles: this opens up surface area and prevents you from cleaning around obstacles.
- Dust horizontal surfaces – Wipe down the exhaust fan grille, light fixtures, and top shelves with a dry cloth. Dust falls downward, so get this done before wet cleaning starts.
- Spray mirrors and fixtures – Apply bathroom cleaner to mirrors and chrome/stainless fixtures: let it sit for 2–3 minutes to loosen residue while you work elsewhere.
- Attack the shower and tub – Spray walls, doors, and fixtures with your chosen cleaner. Let it dwell (sit) for 5–10 minutes.
- Scrub grout and tiles – Use your grout brush and a paste of baking soda and vinegar, or a dedicated grout cleaner.
- Clean the toilet – Apply toilet bowl cleaner under the rim and let it sit while you finish the rest of the room: scrub last, just before the final rinse.
- Wipe down all surfaces – Go back to mirrors, fixtures, walls, and counters with a clean cloth and wipe thoroughly.
- Mop the floor – Use a damp (not soaking) mop to avoid standing water, which can seep under baseboards and cause mold.
- Final rinse – Spray down the shower/tub one more time and use a squeegee to remove water.
Tackling Tough Soap Scum, Mildew, and Hard Water Stains
These three villains are responsible for 90% of bathroom cleaning frustration. Each requires a slightly different approach.
Soap Scum – This white, chalky buildup forms when soap residue reacts with hard water minerals. It clings to shower doors, tub walls, and fixtures. Spray vinegar on the area and let it sit for 15 minutes: the mild acidity softens the scum without scratching tile. For stubborn layers, make a paste of baking soda and vinegar and scrub with a non-abrasive sponge. Avoid scouring powders on acrylic tubs, they scratch easily.
Mildew and Mold – Dark spots in grout, silicone caulk, or shower corners indicate mildew. A step-by-step guide on how to clean your entire bathroom recommends spraying a bleach-based mold killer and letting it dwell for 10 minutes before scrubbing. Never mix bleach with ammonia-based cleaners. Open a window, run the exhaust fan, and wear a mask. If black mold persists even though multiple cleanings, it may indicate a ventilation or water-intrusion problem, consider consulting a professional.
Hard Water Stains – Mineral deposits appear as white, chalky rings on fixtures, glass shower doors, and around drain holes. White vinegar is your best friend here: spray, wait 15–20 minutes, then scrub with a soft cloth. For really stubborn stains, soak paper towels in vinegar, tape them over the stain, and let them sit overnight. On chrome fixtures, use a soft cloth to avoid scratching the finish.
Cleaning Grout, Tiles, and Shower Enclosures
Grout is porous and traps dirt, soap residue, and mildew, it deserves dedicated attention. Tiles are relatively easy to keep clean once grout is handled.
For Grout Lines:
- Start with a stiff-bristled grout brush (or an old toothbrush) and dry brushing to loosen surface dirt.
- Mix baking soda and white vinegar into a thick paste (roughly equal parts). The fizzing action lifts dirt from pores.
- Apply the paste directly into the grout lines using the brush. Push it into the seams, not across them.
- Let it sit for 5–10 minutes, then scrub with short, firm strokes.
- Rinse thoroughly with a damp sponge or cloth: standing moisture can re-seed mildew.
- For really stubborn grout stains, use an oxygen-based grout cleaner (e.g., OxiClean) mixed per label directions. These are gentler than bleach but still effective on organic stains.
For Tiles:
Once grout is clean, tiles are straightforward. Spray a bathroom cleaner or diluted vinegar solution (1 part vinegar to 3 parts water), wait 2–3 minutes, and wipe with a microfiber cloth. Ceramic and porcelain tiles are tough: avoid abrasive scrubbers that will dull the finish. For textured tiles that trap moisture, ensure you’re drying them afterward, wet grout and textured tile stay damp longer and invite mildew faster.
For Glass Shower Doors and Enclosures:
Glass accumulates hard water deposits and soap scum faster than any other shower surface. Spray with vinegar, let it sit 10 minutes, then wipe with a squeegee at an angle. Use a soft cloth (not paper towels, which can streak) for a final buff. For extreme buildup, apply a baking-soda paste, let it sit 5 minutes, gently scrub with a soft sponge, rinse, and squeegee. If your shower doors have a protective seal or coating, check the manufacturer’s recommendations before using acidic cleaners, some coatings are damaged by vinegar.
Restoring Your Fixtures and Ventilation
Fixtures, faucets, showerheads, towel bars, get overlooked but make a huge visual difference once they’re shiny.
Faucets and Showerheads:
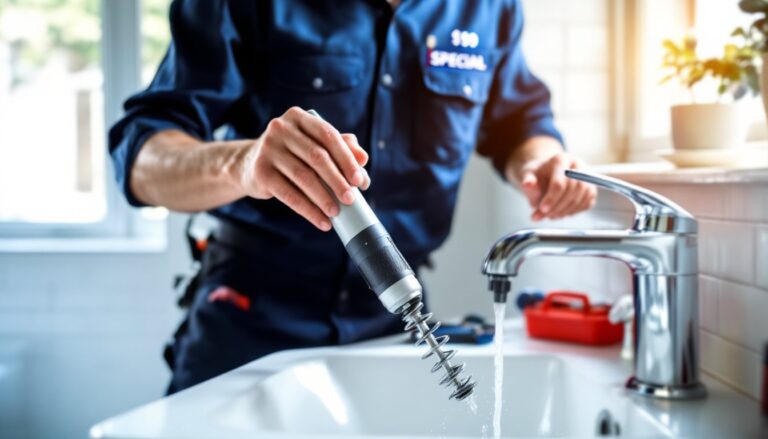
Chrome and stainless steel fixtures show water spots easily. Spray with an all-purpose bathroom cleaner and wipe with a microfiber cloth, rubbing in the direction of the grain if there’s a brushed finish. For mineral buildup inside a showerhead, unscrew it (most unscrew by hand: if not, use a wrench and a cloth to avoid scratching). Soak the showerhead in white vinegar for 30 minutes, then use an old toothbrush to gently clear the perforations. Rinse and reattach.
Towel Bars and Hardware:
Same approach: spray, wipe with a microfiber cloth, buff dry. If hardware is tarnished (dulled brass, for example), baking soda paste works gently: rub gently and rinse immediately.
Exhaust Fan:
The exhaust fan grille collects dust and lint, reducing airflow and efficiency. Turn off power at the circuit breaker before starting. Remove the grille cover (usually held by two screws or clips, consult your fan’s manual if you’re unsure). Vacuum out loose dust, then wipe the grille with a damp cloth. For stubborn buildup, soak in a bathtub of warm water with a bit of mild dish soap for 10 minutes, then gently scrub and rinse. Replace the cover and restore power. A cleaner exhaust fan means better humidity control and less mildew growth in the long term.
Mirror and Light Fixtures:
Spray glass mirrors with bathroom cleaner and wipe with a microfiber cloth for a streak-free finish. Light fixture covers (usually acrylic or glass) can accumulate dust and dead insects inside. If the fixture is accessible, turn off power, remove the cover, vacuum the interior, and wipe the cover with a damp cloth before reinstalling. If you’re unsure about electrical access, skip this, it’s not a critical part of deep cleaning.
Maintain Your Results With a Simple Weekly Routine
One weekend of deep cleaning will look amazing, until life happens. A 10-minute weekly routine keeps it that way and prevents buildup from restarting the cycle.
Weekly (Sunday evening or whenever fits):
• Spray the shower/tub with a daily shower spray or diluted vinegar solution and wipe down glass doors and walls with a squeegee.
• Wipe mirrors and fixtures with a dry cloth to prevent water spots from hardening.
• Spray and wipe the toilet exterior and bowl rim.
• Sweep or quick-mop the floor.
• Ensure the exhaust fan runs for at least 20 minutes during or after showers to manage humidity.
Monthly (every 4 weeks):
• Re-scrub grout lines with baking soda paste if mildew spots are starting to return.
• Soak showerhead in vinegar again if water pressure is dropping.
• Wipe down baseboards and door frames where moisture collects.
• Consider home improvement how-tos from a trusted source when you need refresher tips or want to tackle related projects like recaulking or refinishing tiles.
The key insight: 10 minutes weekly prevents the need for another full deep clean for 3–6 months. Moisture is your enemy in bathrooms, so run the exhaust fan during showers and for 20 minutes after, and don’t leave standing water on surfaces.
Conclusion
A deep bathroom clean done right transforms the space and takes about 4–6 hours of focused work over a weekend. Armed with the right supplies, a logical order of operations, and proven techniques for soap scum and grout, you’ll finish the job faster and with better results than random scrubbing. The payoff isn’t just appearance, a clean, well-ventilated bathroom resists mold growth and stays fresh longer. Stick to a simple weekly routine to protect your hard work, and you’ll enjoy a bathroom that feels genuinely clean, not just tidy.